- What is Jenkins
- Create your first job
- create another docker container as the remote for running the jobs.
- AWS
What is Jenkins
Jenkins, which is considered to be the best open-source automation server, provides a wide range of plugins that can be very helpful in automating various types of projects. These plugins can assist in tasks such as building and deployment.
Jenkin is written in Java and is designed to be highly extensible. This means that you can customize Jenkin to fit your specific needs. You can add plugins to Jenkin that allow you to integrate it with other tools in your development process. This includes things like code repositories, issue trackers, and more.
install the centos 7 os with virtual box.
please use the iso file of centos minimal to install the VM for linux.
CentOS-7-x86_64-Minimal-2009.iso
after we have the VM, we use the putty program to connect to the VM and start installing the jenkin.
Install jenkin
Step 1 install docker.
please follow the installation of docker for linux to install docker engine. docker installation
sudo yum install -y yum-utils

sudo yum-config-manager \
    --add-repo \
    https://download.docker.com/linux/centos/docker-ce.repo
Install Docker Engine
sudo yum install docker-ce docker-ce-cli containerd.io docker-buildx-plugin docker-compose-plugin

# start docker service
sudo systemctl start docker

# enable docker

sudo systemctl enable docker

# verify docker install
sudo docker run hello-world

# we need to modify the exist user to able to run docker without sudo (administrator).
# the below command tell linux to add the user jenkin to docker groups.
# after this command, we need to logout and login agains.

sudo usermod -aG docker jenkin
install docker compose.
To download and install the Compose CLI plugin, run
curl -SL https://github.com/docker/compose/releases/download/v2.17.2/docker-compose-linux-x86_64 -o /usr/local/bin/docker-compose
Apply executable permissions to the binary:
chmod +x $DOCKER_CONFIG/cli-plugins/docker-compose
# check the version
docker compose version
 Docker Compose version v2.17.2
install jenkin by Docker image
at first we need to find the docker image on docker hub and then we type in the following command to download the image.
docker pull jenkins/jenkins

# docker root
docker infor | grep -i root
Create a Docker compose file for jenkins
vi docker-compose.yml
prepare the docker compose file for installing jenkin.
version : '3'
services:
    jenkins:
        container_name: jenkins
        image: jenkins/jenkins
        ports:
          - "8080:8080"
        volumes:
          - $PWD/jenkins_home:/var/jenkins_home
        networks:
          - net
networks:
    net
# change the owner of the folder
sudo chown 1000:1000 jenkins_home -R

# show ID of the groups
id
start docker-compose
docker-compose up -d
after that check the docker container by docker ps
to start jenkin, please open the browser and input the VM ip address. In my case, I input 192.168.40.77:8080
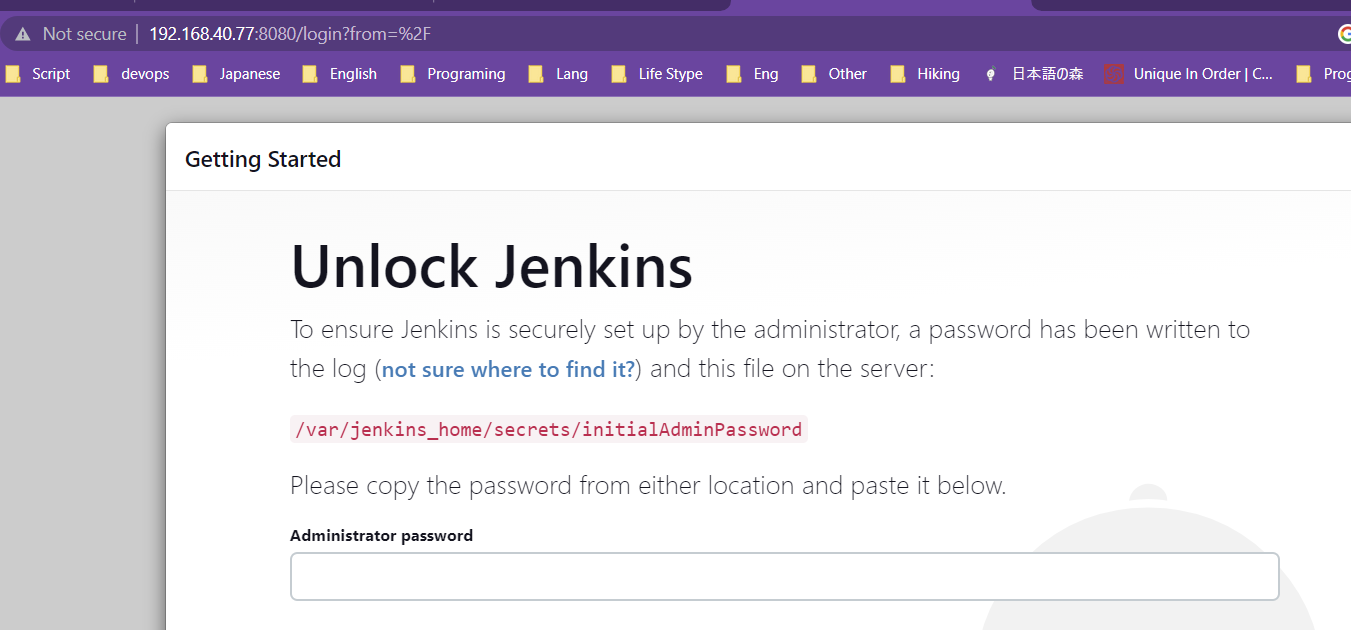
you can find the passwords by using the command docker logs -f jenkins

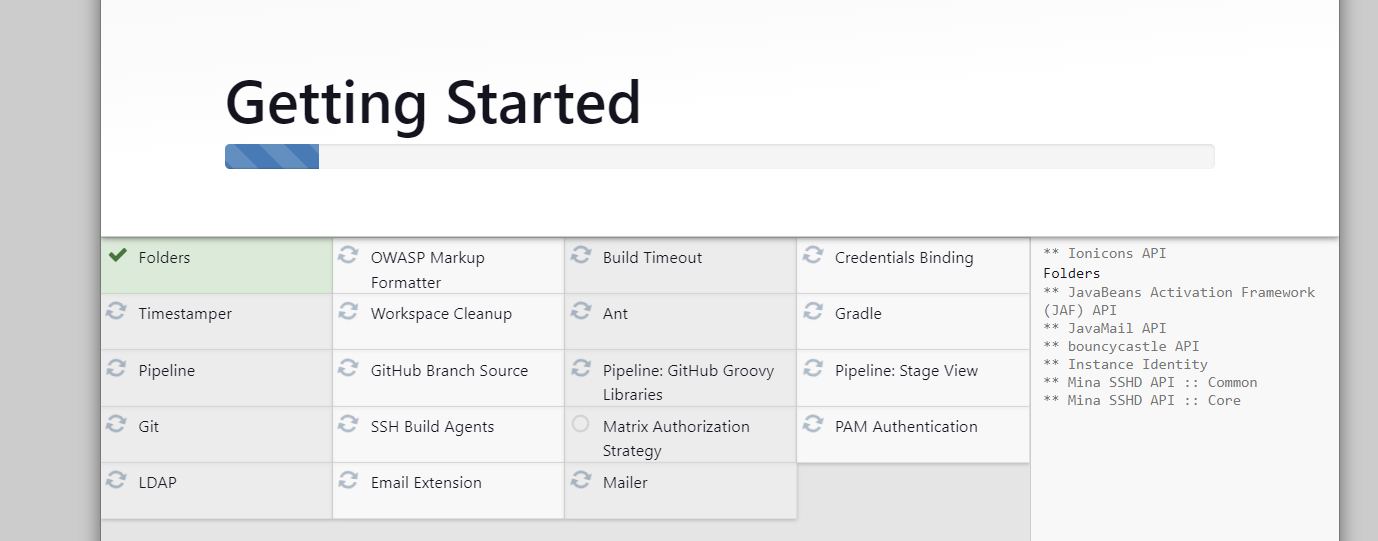
install pluggin for jenkins
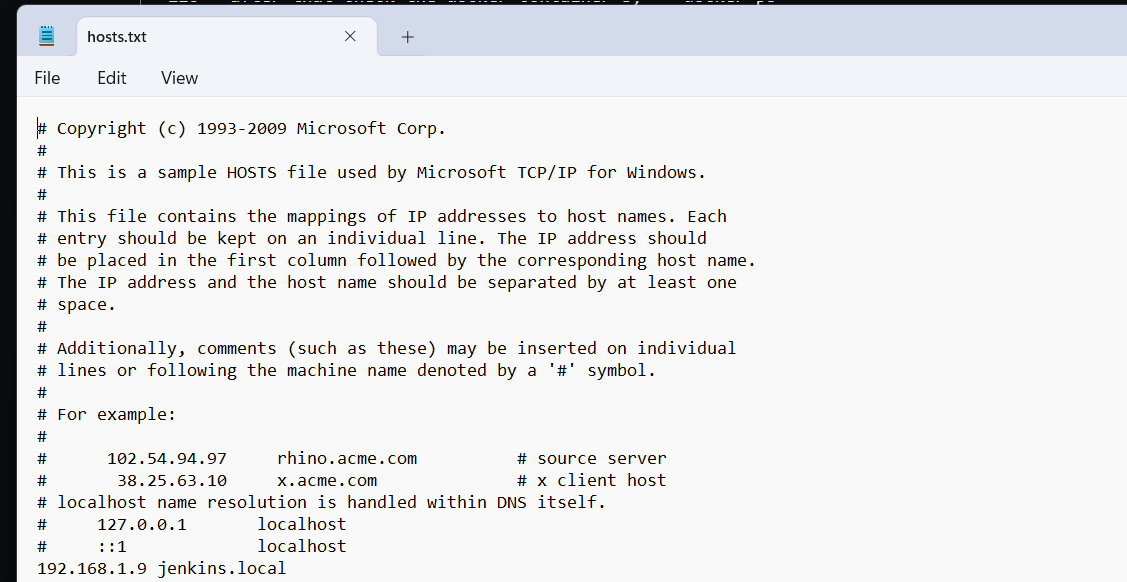
create local DNS for jenkin pages
You can add the local DNS to C:/window/system32/drivers/etc/host
Create your first job
Let’s take a closer look at the GUI of Jenkins. Our initial example involves creating a job that executes a shell script command within Jenkins. In the upcoming session, we will explore creating the execution process on a separate machine or container.
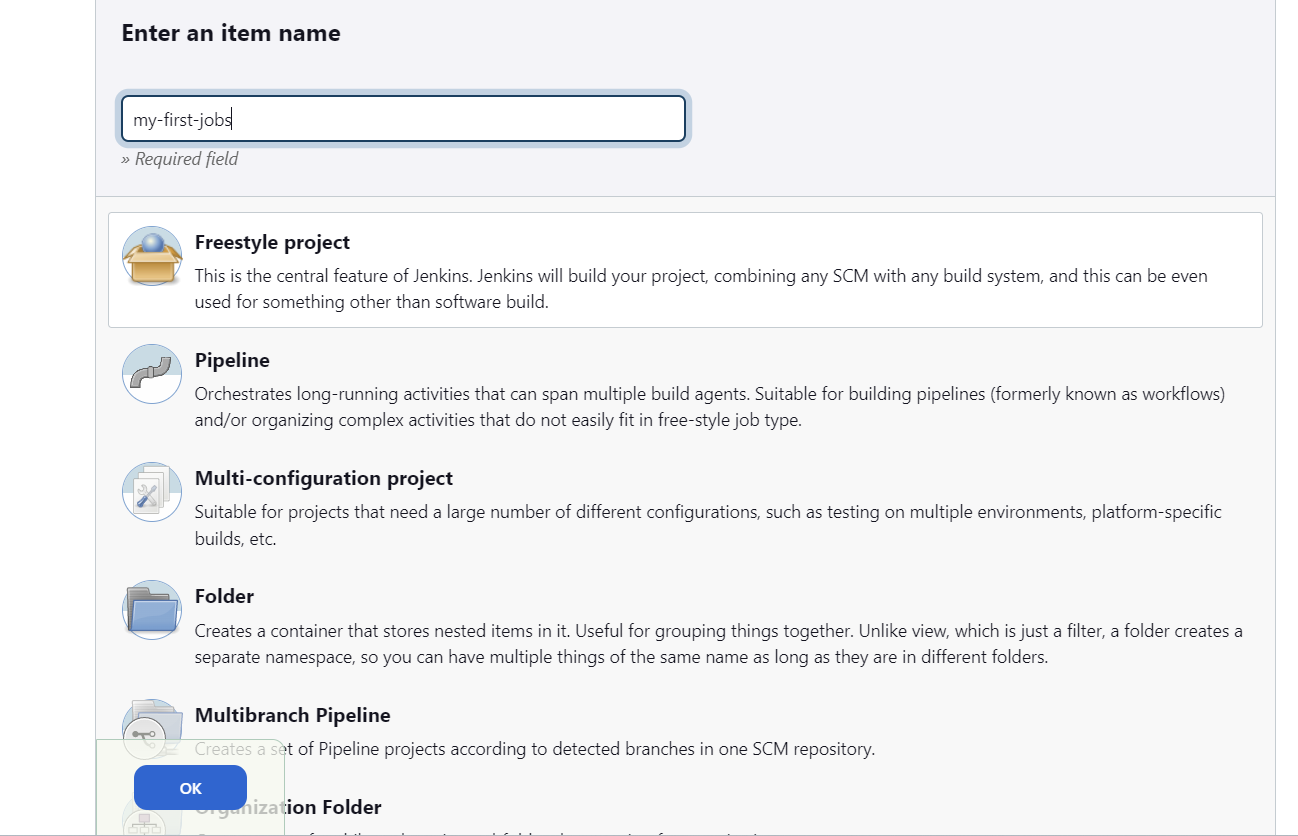
step 1: create job name.
Click on the new item button and then create new job with name.
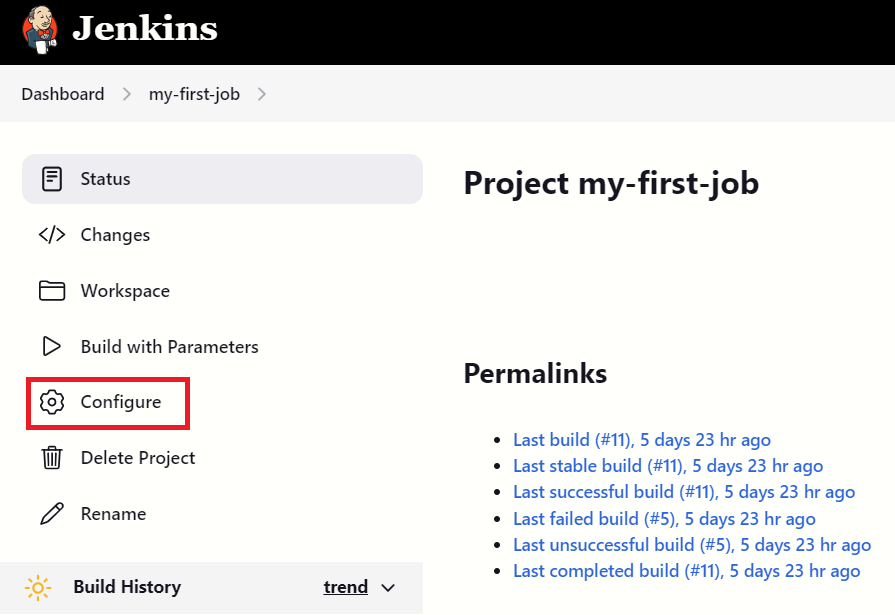
Step 2: configurate the job.
click on the job in dashboard, then go to inside the job, and click Configure button.
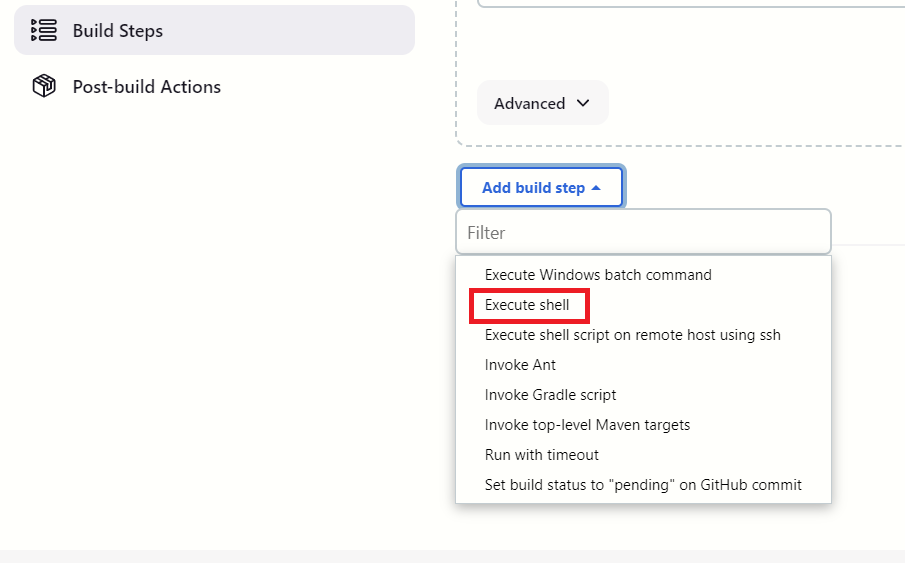
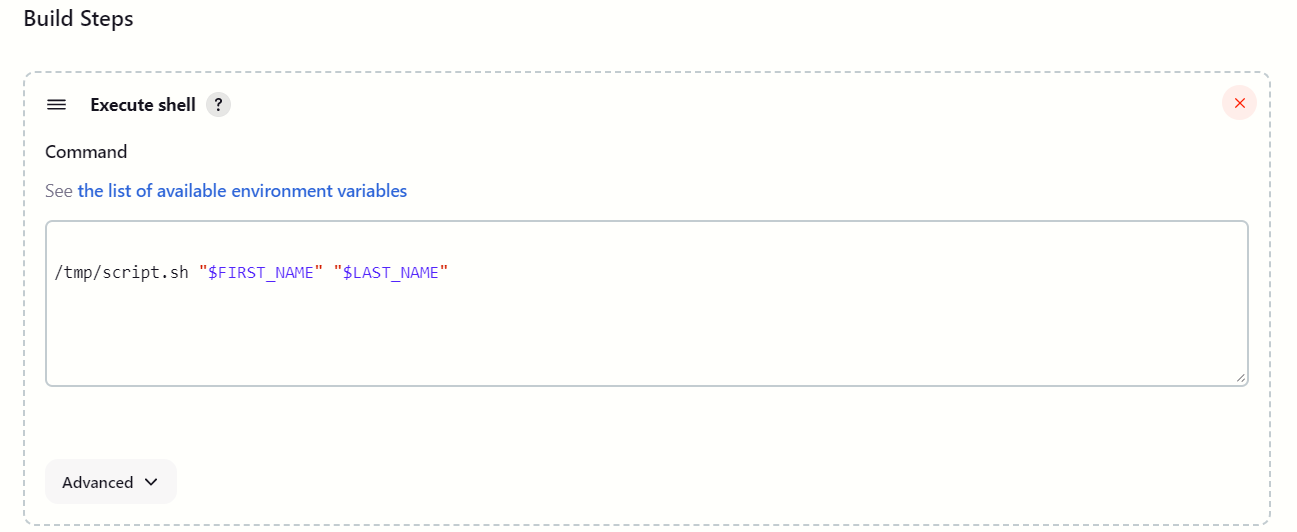
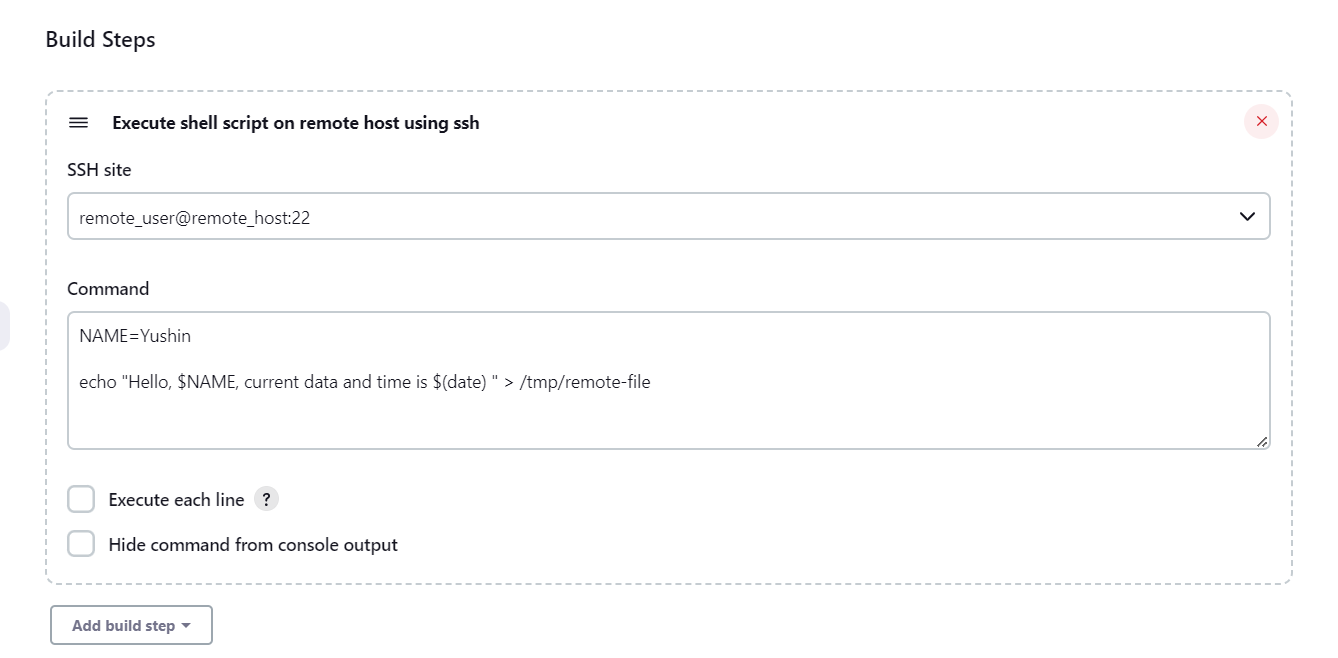
Go to the build steps and drop down the list and pick the Execute shell
Then create your first scripts
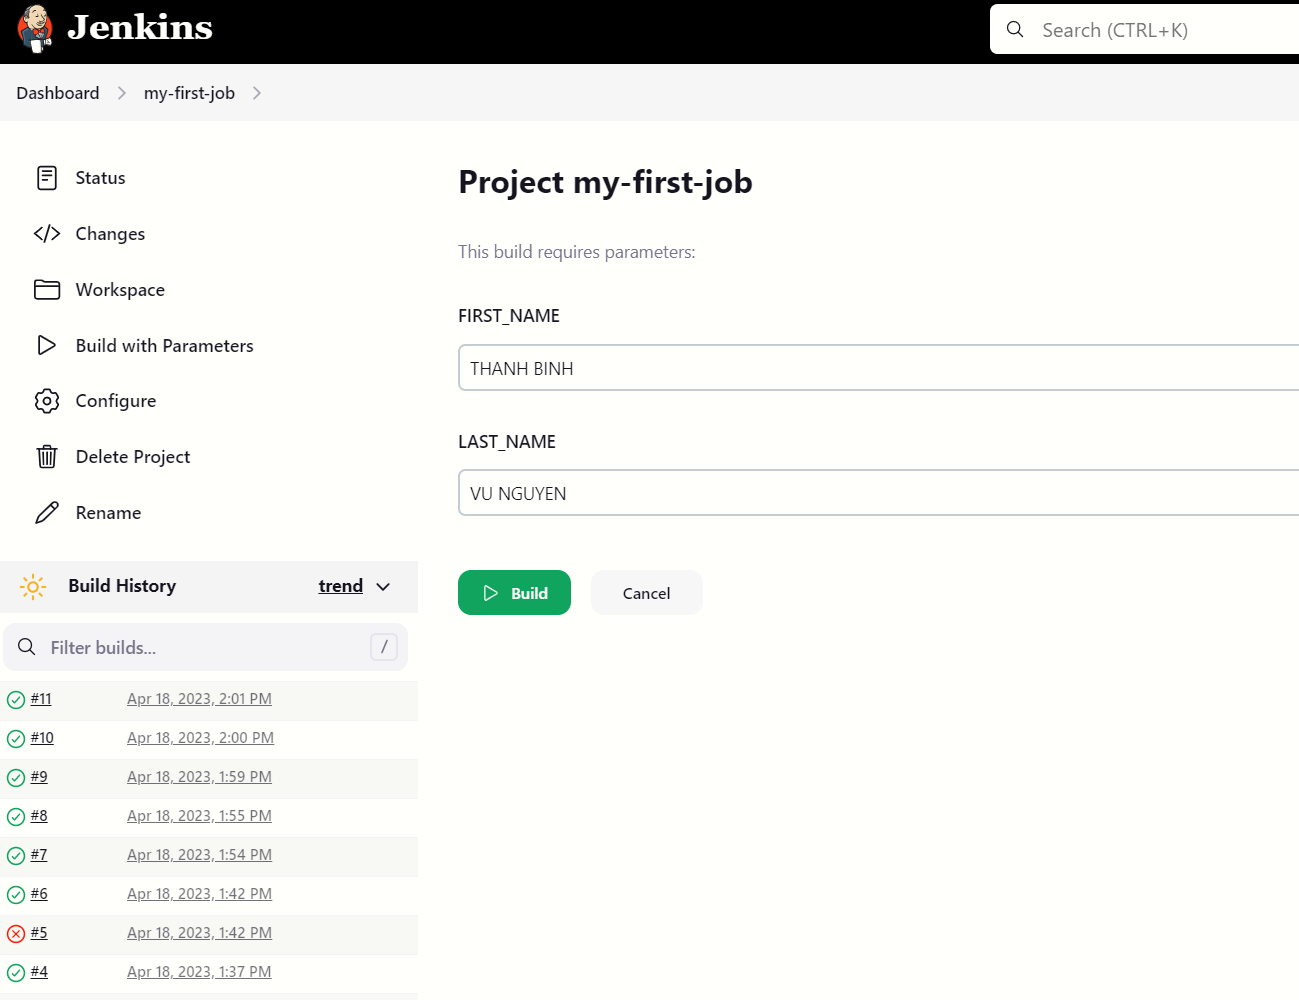
Running the jobs.
Click on the Build button to run the job build.
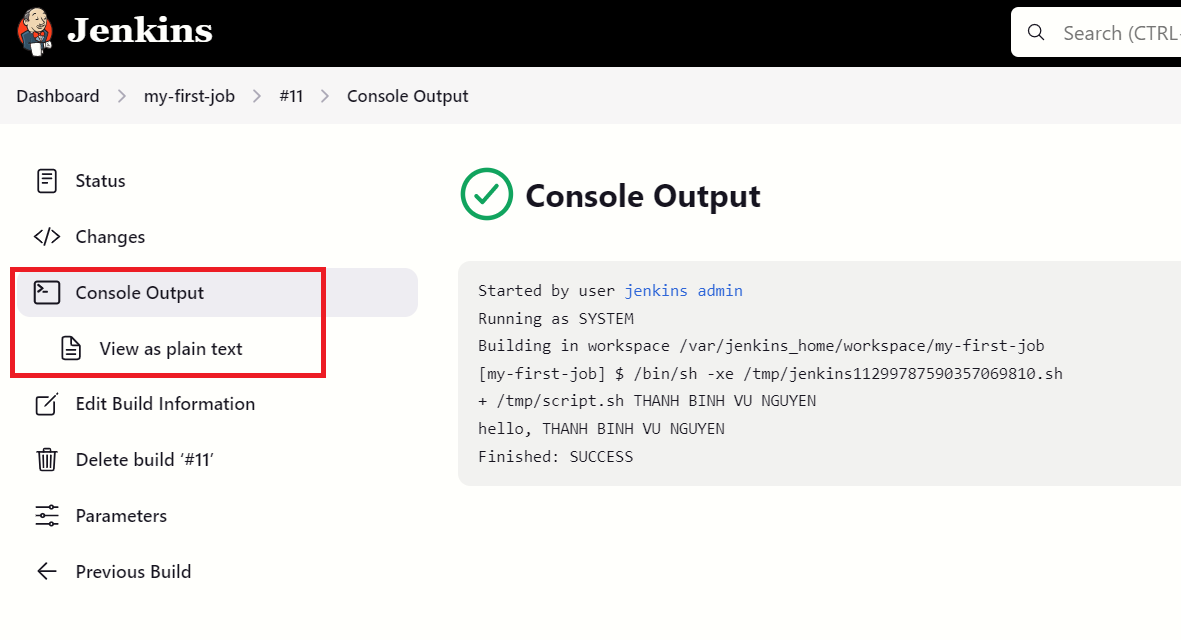
Next wait for the job build completed, then you can check the build success or failed by clicking on the job id which correspond with your build job and check wherether the icon is blue stick or red x.
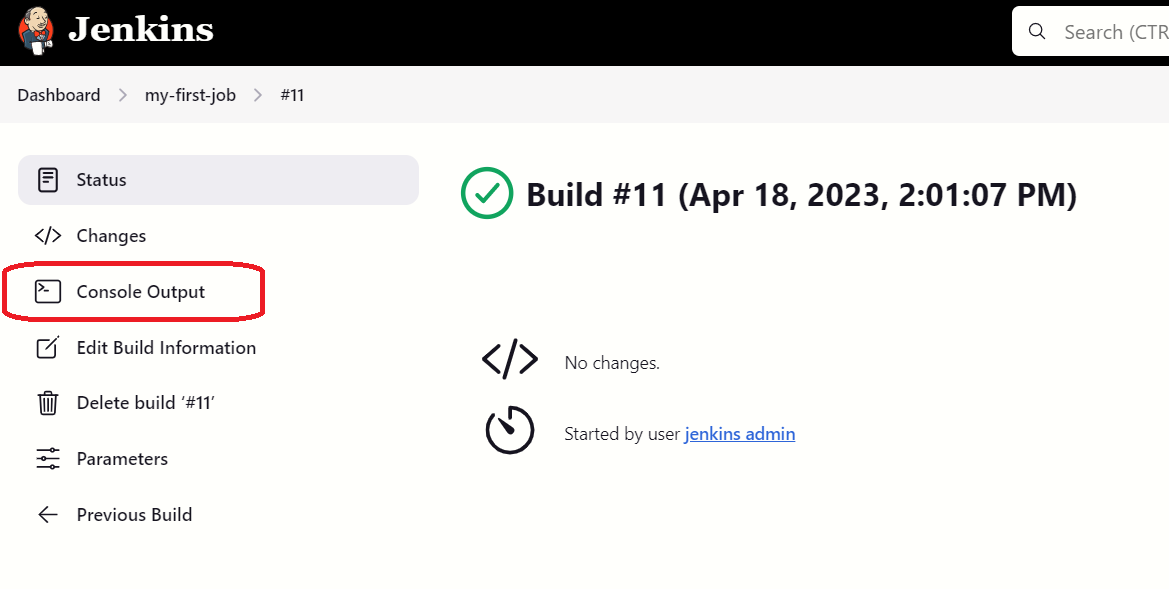
You can also check the build log by clicking on the console output.
create another docker container as the remote for running the jobs.
As mentioned before, we will create the node for Jenkins. Actually, we can add the node to Jenkins using another machine, virtual machine, or containers. In this lecture, I will focus on Docker and containers, so I would like to create a container for running the Jenkins node.
At first, we will create the Docker image which contains the environment for running an SSH server. You can check the “Dockerfile” which includes the image configuration. This image will be based on CentOS 7 and will enable access to the server by SSH public key. We will use ssh-keygen to generate the public and private keys.
ssh-keygen -t remote-key
after running that command, it will automatically generate the public key and private key for the remote_host container.
[jenkin@localhost jenkins-data]$ cat centos7/remote-key
-----BEGIN RSA PRIVATE KEY-----
MIIEowIBAAKCAQEAqtfMvPktA03OjRteDUpBU+gQkVH3WZdUWk2YIQnin3YxcjTX
jMPK38hXxOja6YnqKX5Cppm4HYwGBytSXb8yS/jj5EGDvk1Wrg30mZ2ZptAHGEvw
v7WvG/Vepcq/ST/7ORZefbsj/XKs2++k56fmJySk5sc8CQaNwB/k3CFkA4VgKgtm
Rx4UuPzT9b63SaEnRiYTStnP8PRQgvCgGJnCRCTXyicGEsp9l74aRqcNaaQGpHga
xfFKDv7i/Mnw8ya5MGUBrkyhGAPirrCRDk8b4eWGdwt6xDpxvbN5Mfp8WuQBWMko
1yUYcTzXqphIqUeCRqR/mFzFrr6p/7TL2+I2WQIDAQABAoIBAGCqfkQm0VtfORIK
fCsU6uXpFwbC1CwzPh1ibkOzbjFAFTZDw/r4BeCdYVwfTU57JK2ZrWjK7ax6QCbq
Uk6NEo5+I6RRlZOl+ve9GbuZuwjyCDGtNmmjCZPOQGGa2KU/uIxSpeCKdRDBRCGl
9S7Gh6l6SHv0G3oX5TjiUwJjOk3qyvcVINZNQ4RAb6x5y1JOJ/W7QL5qQVCwAehA
0TDY5Aln1cRteyiuzevNCsmkIyAxKY/kPm9Bv4mRNcdi2vLlHySz07GYBJDL2z1U
r/6mqMVGdduG5TqE48l0P4MnS7pggSgLO9bA5v3Isub5vza0+OaQ8/H04dMGdJik
aCSwMUkCgYEA2ALjS5jUDldvqZiJk5fgwPxPZ9Ait4fHrpWCPmPaBwp+hEBBfXk3
VCLWv4Y2hgXwAMCw0J7SKHrECRO/pVGOWMrmreJerFE3Bg2JqAQbhEQYXc6Ijguf
yT6qqM3GlGqrGNkY+UVBjb81R0P7T6wPAowwC0bAeRX0JWvAhCwxb6cCgYEAynhQ
oQd4K4MW67po/KylgFDbqi8Lbow1Pn/vTb475Mv3RSLKEufnUBlT1XrDCR64Y0ZO
6njb9BbCI5ht3vTIiTK0KLVNK3YfI5AZvixF9bocjnH+yMHeM3o+OkFxwaAjgpyD
2gGqyDApKoiE7tLp/mKkUg6HfkMZ96PP0tBz6f8CgYEAuJIPIQMe/nobgTBDLYey
lXOBbdTcNTGhnz1EooazPxzqaZp12v5+FjgGgnPtlqrwHdSHwFpUfB4Z7x+eu2Vq
WdhVLvKjrl1exJ9Apf2MfYGpyE23RJgOGeif7ciWCy7xrzOhMSzKDJH6tkASNktw
L98VFi2IPG5TxL3DK6yPOTUCgYAcfyKaB3saZLDtLKdqKMKCdN717Pkm7gTwbwE3
Z/b2FN8Qk/zs/EbKN0ZdXZHlzrUVA+hHiAstJ6bba7DLGJjA9qn0sM/TtiRb1QRK
h+Cw3Sj3w4OgreigRixL9roUDn3w/CZyoJlw45Znrh9HndfhPfDyu6jGVJtrB1tQ
yJYH8QKBgAzLTytBVSGnQ7Ea9hh8dhGWIZcbRzwET5YHCE7lPr+eEuSrOfpbNpaM
nogB0vaD7aDC6VwTd+cdCAwjd+sCgeZ2Z2d/UsjoNkVGyArTXqeexSb/nL1a8VPf
yqyxU42+oas3H+68SAqiIsjkfd1zQHSBCcK15kdtveZ0A4Io+l7x
-----END RSA PRIVATE KEY-----

[jenkin@localhost jenkins-data]$ cat centos7/remote-key.pub
ssh-rsa AAAAB3NzaC1yc2EAAAADAQABAAABAQCq18y8+S0DTc6NG14NSkFT6BCRUfdZl1RaTZghCeKfdjFyNNeMw8rfyFfE6NrpieopfkKmmbgdjAYHK1JdvzJL+OPkQYO+TVauDfSZnZmm0AcYS/C/ta8b9V6lyr9JP/s5Fl59uyP9cqzb76Tnp+YnJKTmxzwJBo3AH+TcIWQDhWAqC2ZHHhS4/NP1vrdJoSdGJhNK2c/w9FCC8KAYmcJEJNfKJwYSyn2XvhpGpw1ppAakeBrF8UoO/uL8yfDzJrkwZQGuTKEYA+KusJEOTxvh5YZ3C3rEOnG9s3kx+nxa5AFYySjXJRhxPNeqmEipR4JGpH+YXMWuvqn/tMvb4jZZ jenkin@localhost.localdomain
We’ll transfer the private key to the remote_host container using a Docker file. Essentially, a Docker container functions similarly to a virtual machine, allowing you to copy files and install applications during the Docker image building process. You can find more information in the code snippet below.
FROM centos:7

RUN yum -y install openssh-server

RUN useradd remote_user && \
    echo "1234" | passwd remote_user --stdin && \
    mkdir /home/remote_user/.ssh && \
    chmod 700 /home/remote_user/.ssh

COPY remote-key.pub /home/remote_user/.ssh/authorized_keys

RUN chown remote_user:remote_user -R /home/remote_user/.ssh && \
    chmod 600 /home/remote_user/.ssh/authorized_keys

RUN /usr/sbin/sshd-keygen

RUN yum -y install mysql

RUN curl -O https://bootstrap.pypa.io/pip/2.7/get-pip.py && \
        python get-pip.py && \
        pip install awscli --upgrade

CMD /usr/sbin/sshd -D
Afterward, we will make modifications to the Docker Compose file in order to include the remote_host service. In the remote host configuration, we will add the build instruction, which will guide Docker Compose to build the remote_host image. Subsequently, we can utilize this image for the container.
version: '3'
services:
  jenkins:
    container_name: jenkins
    image: jenkins/jenkins
    ports:
      - "8080:8080"
    volumes:
      - $PWD/jenkins_home:/var/jenkins_home
    networks:
      - net
  remnote_host:
    container_name: remote_host
    image: remote_host
    build:
      context: centos7
    networks:
      - net
networks:
  net:
Once the configuration file modifications are complete, we can proceed to create our container. To begin, we need to build the remote_host image using the command docker-compose build. Following that, we can start up the container using the command docker-compose up -d.

we can check our remote-host container by access dirrectly to the container by docker exec -it remote_host bash

we can also, access remote_host container through jenkins container.
docker exec -it jenkins bash

# check remote_host running or not
ping remote_host

# access using ssh key, it allow you to connect to your remote_host container.
ssh remote_user@remote_host
Next, we will test the connection using the key file that we created.
# copy key file to docker container

docker cp remote-key jenkins:/tmp/remote-key

# access to jenkins docker container
docker exec -it jenkins bash

# connect to remote_host container using ssh key

ssh -i remote-key remote_user@remote_host
Install Jenkins pluggin.
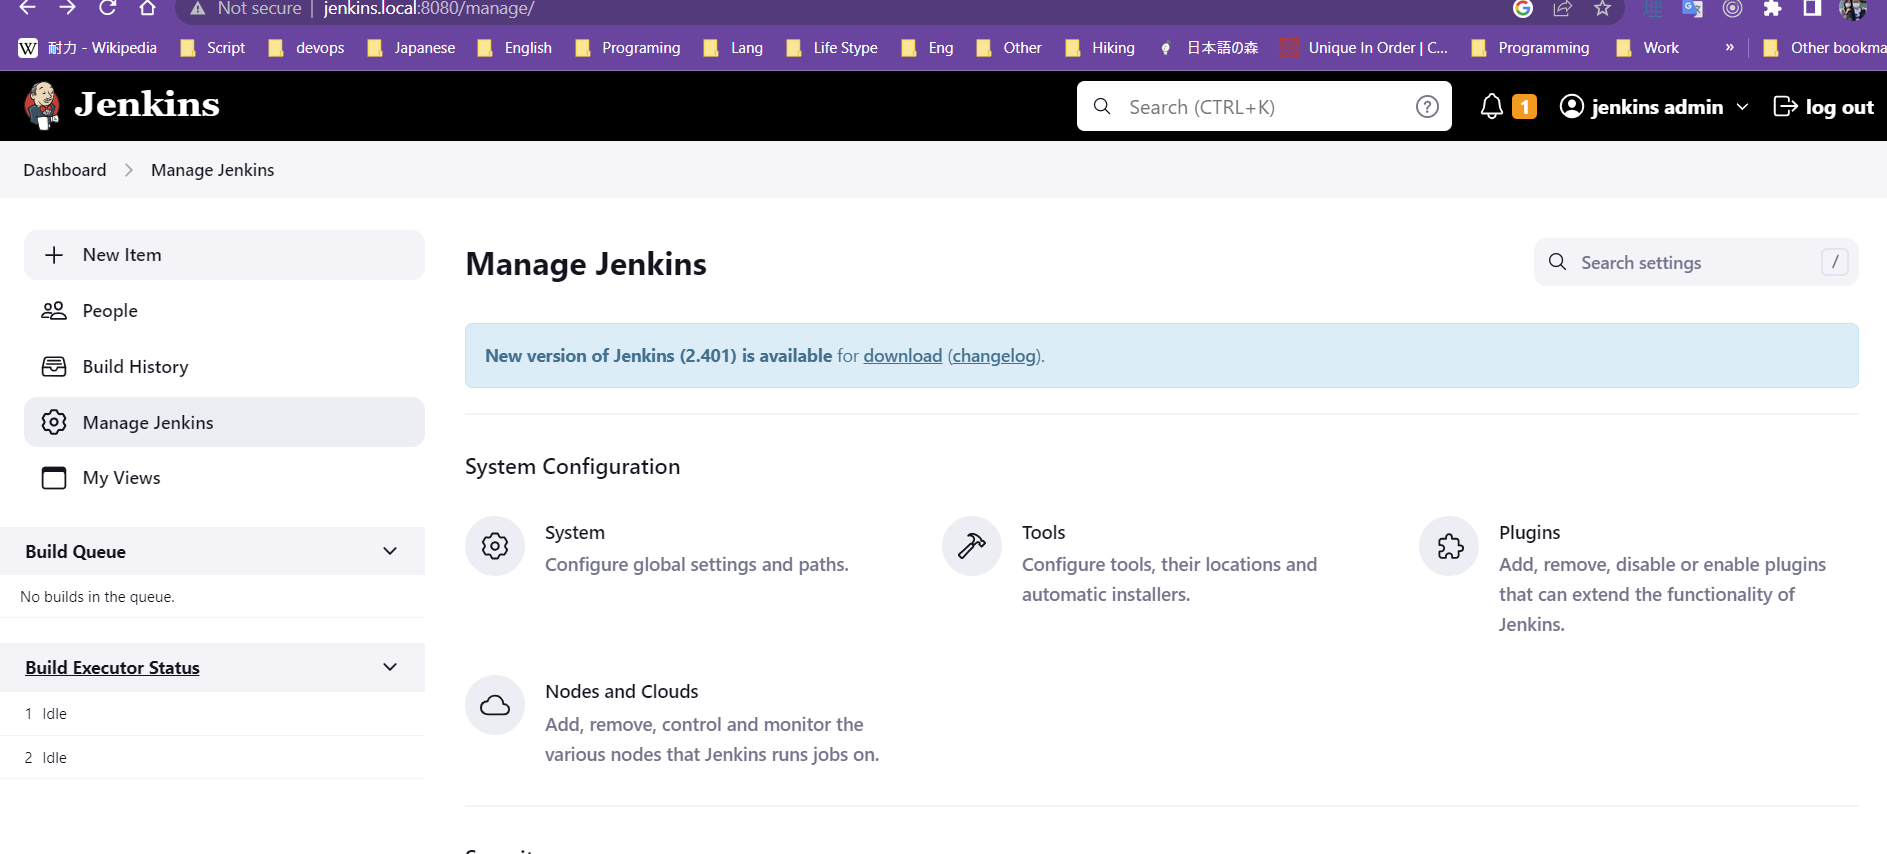
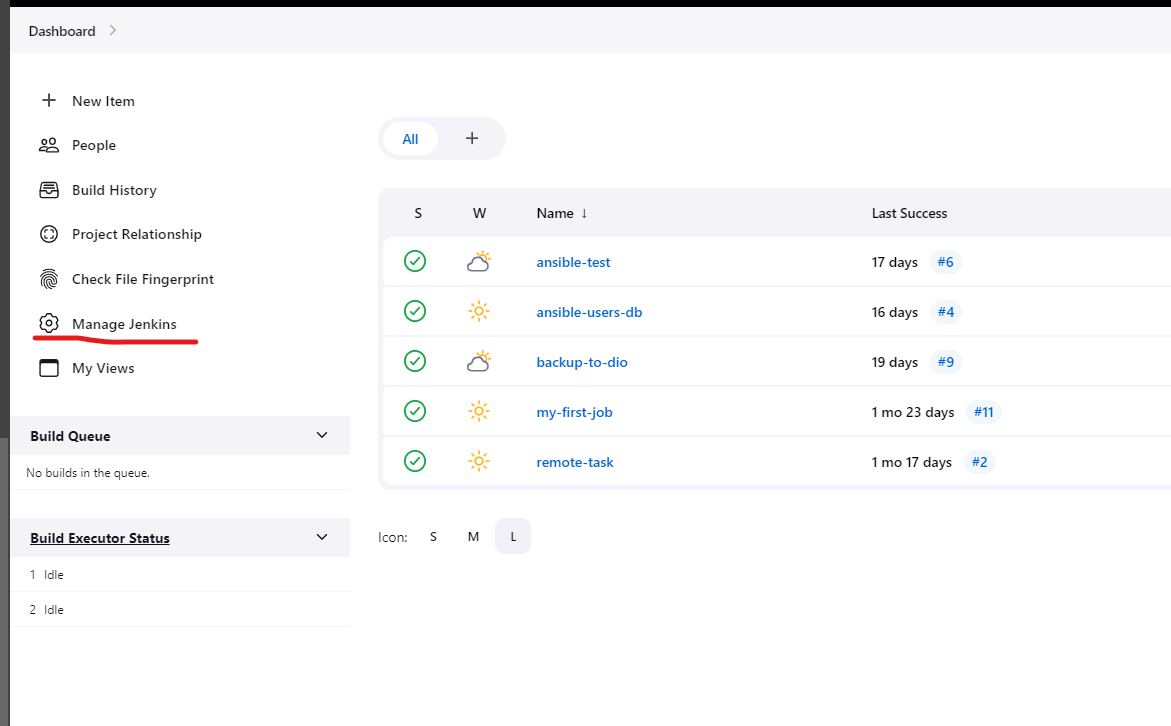
- Step1: Select Magage Jenkins
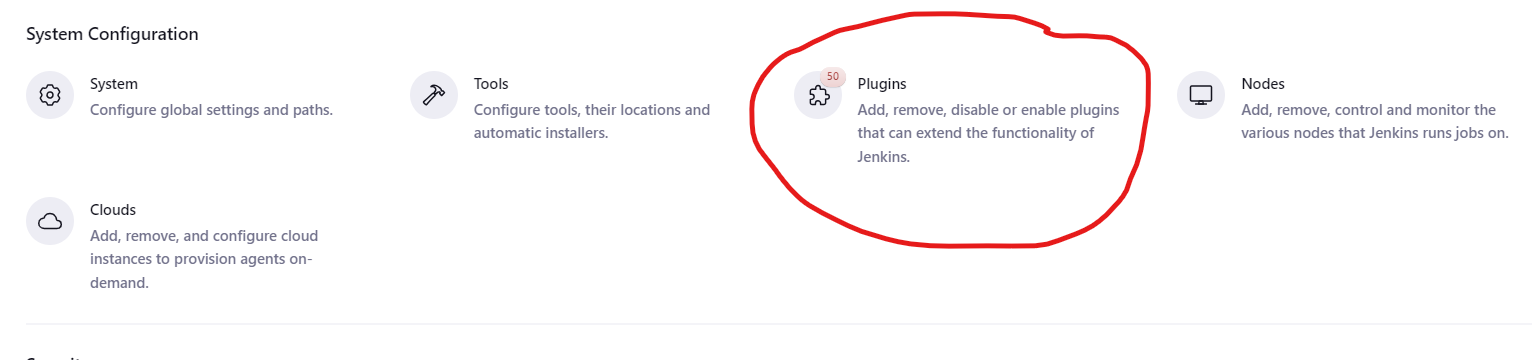
- Step2: Select Plugins.
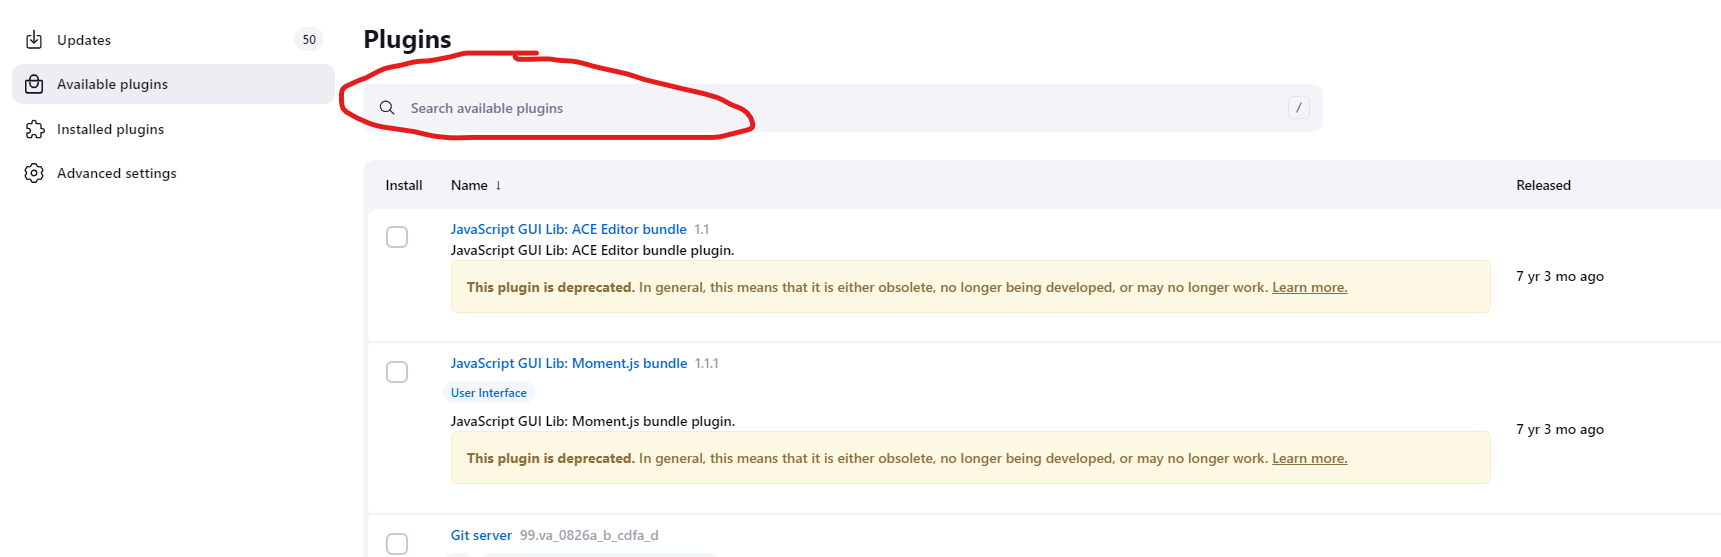
- Step3: Click Available pluggins and select plugin you want to install (ssh).
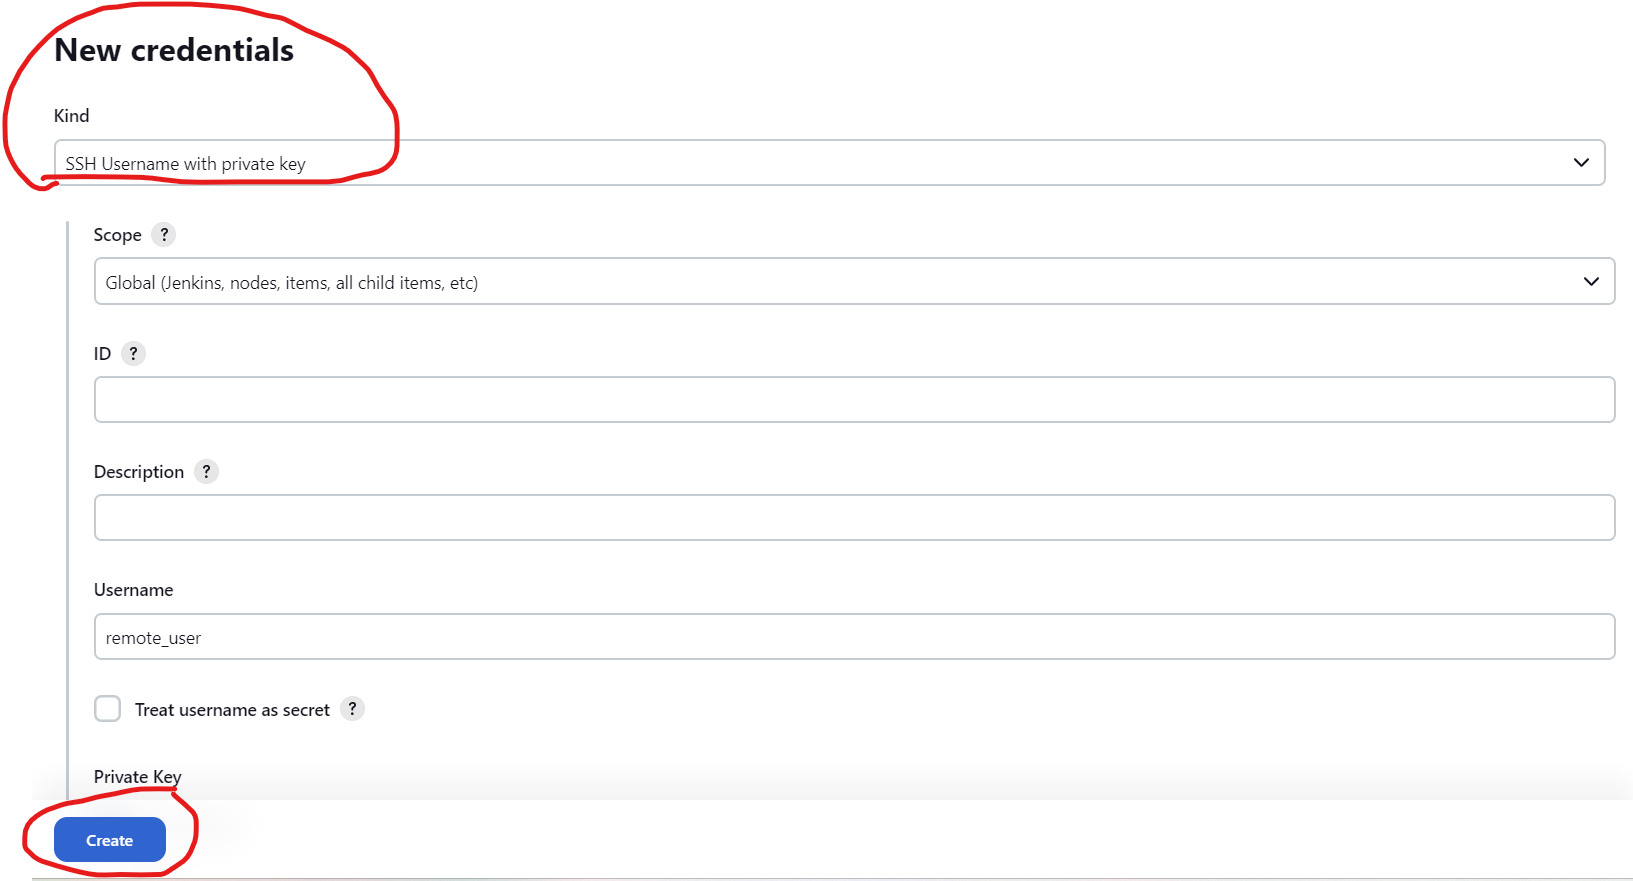
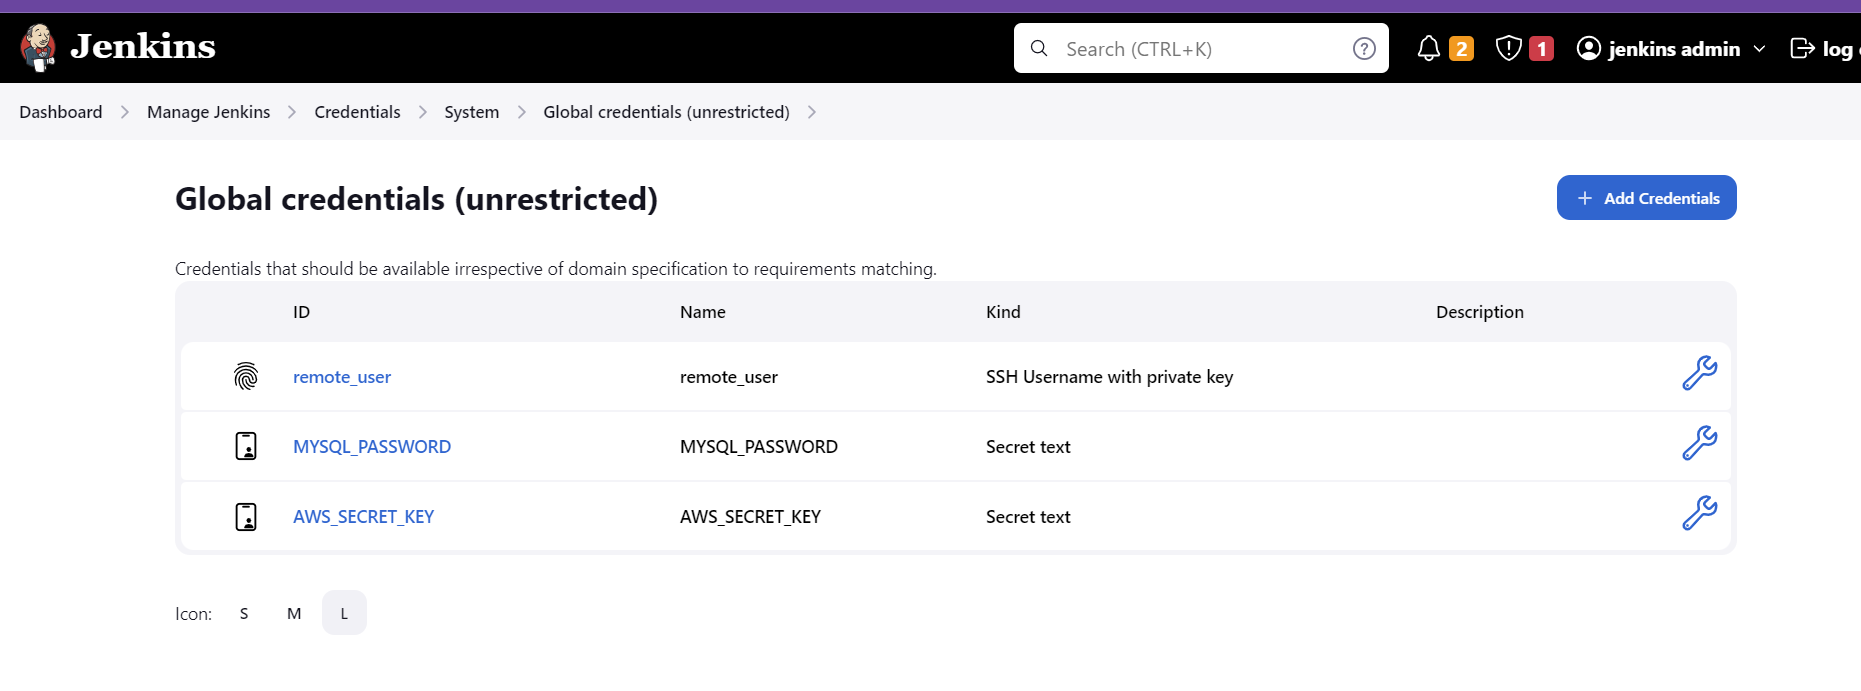
Create Credential for access to remote_host container.
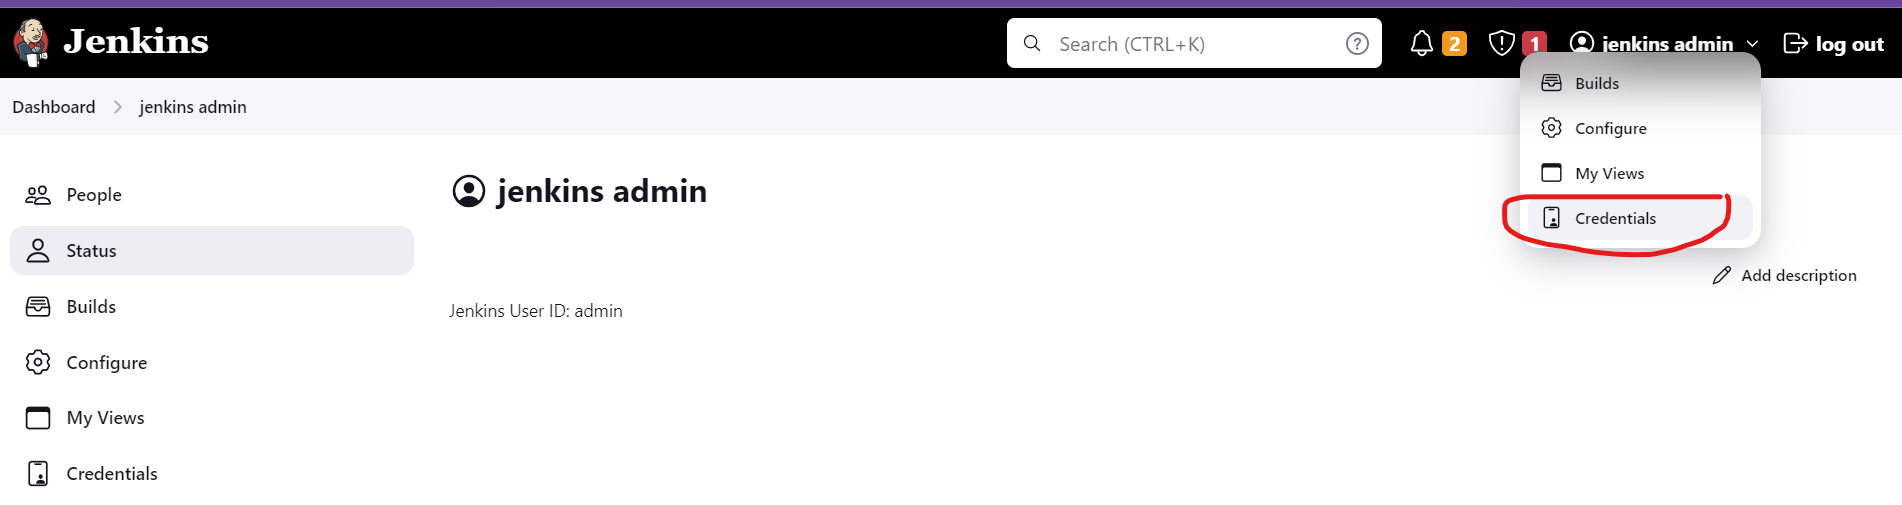

Check connection with remote_host and create jenkin job.

AWS
In this session, we will create backup data using mySQL and aws s3 bucket (digital ocean space bucket). At first, we will create the database container using mysql image, please check the below docker compose.
version: '3'
services:
  jenkins:
    container_name: jenkins
    image: jenkins/jenkins
    ports:
      - "8080:8080"
    volumes:
      - $PWD/jenkins_home:/var/jenkins_home
    networks:
      - net
  remnote_host:
    container_name: remote_host
    image: remote_host
    build:
      context: centos7
    networks:
      - net
  db_host:
    container_name: db
    image: mysql:5.7
    environment:
      - "MYSQL_ROOT_PASSWORD=1234"
    volumes:
      - "$PWD/db_data:/var/lib/mysql"
    networks:
      - net
networks:
  net:
then you can deploy database container by docker-compose up -d
Install MySQL client and aws cli.
In order to install mysql client and aws cli, we need to modify Dockerfile, and rebuild remote_host image.
FROM centos:7

RUN yum -y install openssh-server

RUN useradd remote_user && \
    echo "1234" | passwd remote_user --stdin && \
    mkdir /home/remote_user/.ssh && \
    chmod 700 /home/remote_user/.ssh

COPY remote-key.pub /home/remote_user/.ssh/authorized_keys

RUN chown remote_user:remote_user -R /home/remote_user/.ssh && \
    chmod 600 /home/remote_user/.ssh/authorized_keys

RUN /usr/sbin/sshd-keygen

RUN yum -y install mysql

RUN curl -O https://bootstrap.pypa.io/pip/2.7/get-pip.py && \
        python get-pip.py && \
        pip install awscli --upgrade

CMD /usr/sbin/sshd -D
in this example we will use aws cli with digital ocean space bucket, since I don’t have aws account.
Create MySQL Database.
- Step1: connect to mysql server.
mysql -u root -h db_host -p
Create Scrip to backup data.
#/bin/bash


DATE=$(date +%H-%M-%S)
BACKUP=db-$DATE.sql
DB_HOST=$1
DB_PASSWORD=$2
DB_NAME=$3
DIGITIAL_OCEAN_SECRET=$4
BUCKET_NAME=$5
mysqldump -u root -h $DB_HOST -p$DB_PASSWORD $DB_NAME > /tmp/db-$DATE.sql


export AWS_ACCESS_KEY_ID=DO00TTLNYTXXEGUZQHEH && \
export AWS_SECRET_ACCESS_KEY=$DIGITIAL_OCEAN_SECRET && \
echo "uploading your db backup" && \
aws s3 --endpoint https://space-demo-2023-01.nyc3.digitaloceanspaces.com cp /tmp/db-$DATE.sql s3://$BUCKET_NAME/$BACKUP
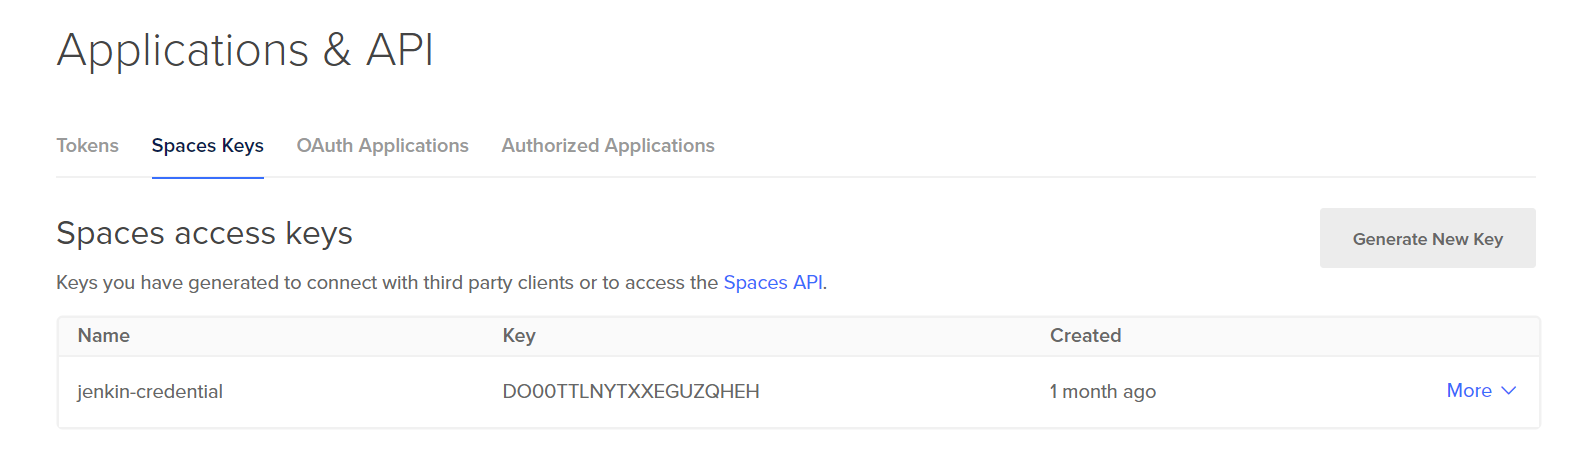
Create Digital ocean space bucket
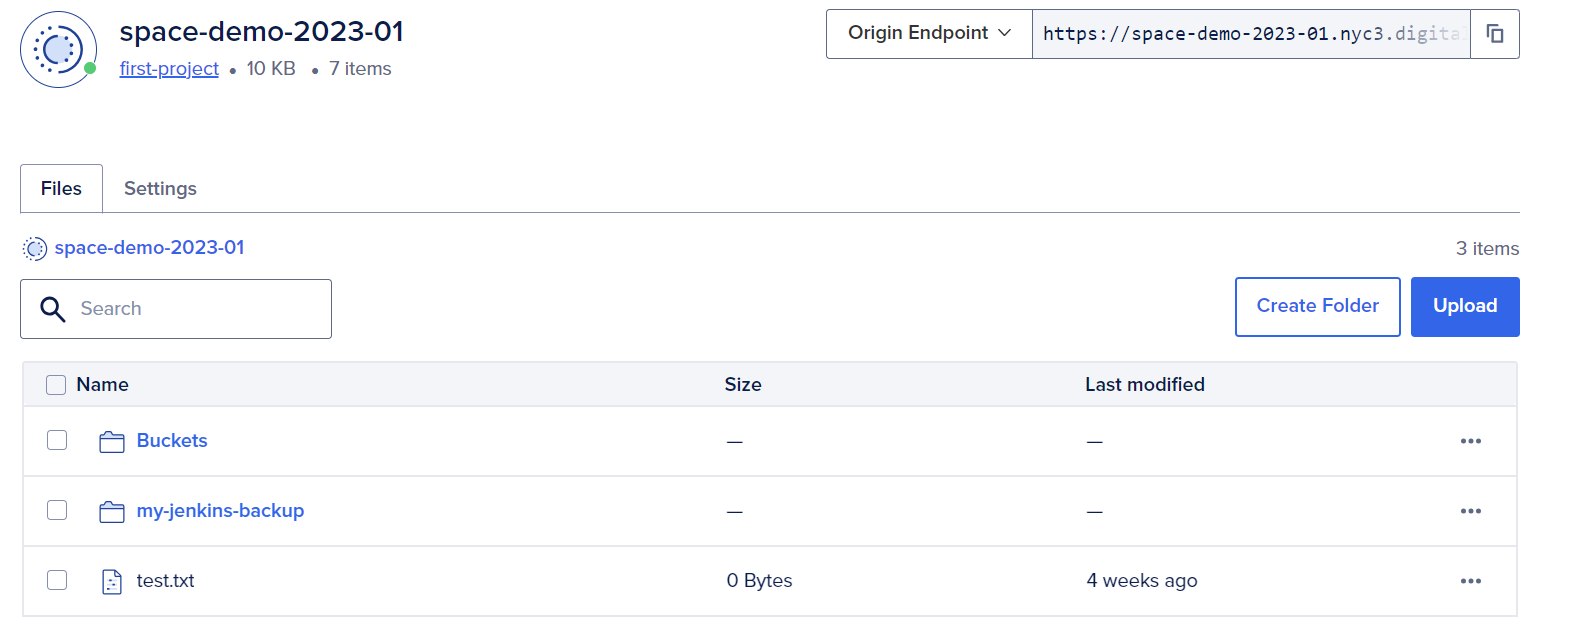
Create Digital ocean space bucket key, and scretkey.